Feel free to download and customize templates according to your needs. The list will be constantly updated with more sample templates.
Template installation instructions
DOC / DOCX
In order to use DOC templates, select Template Format as DOC in template editor, and upload desired DOC file.
HTML
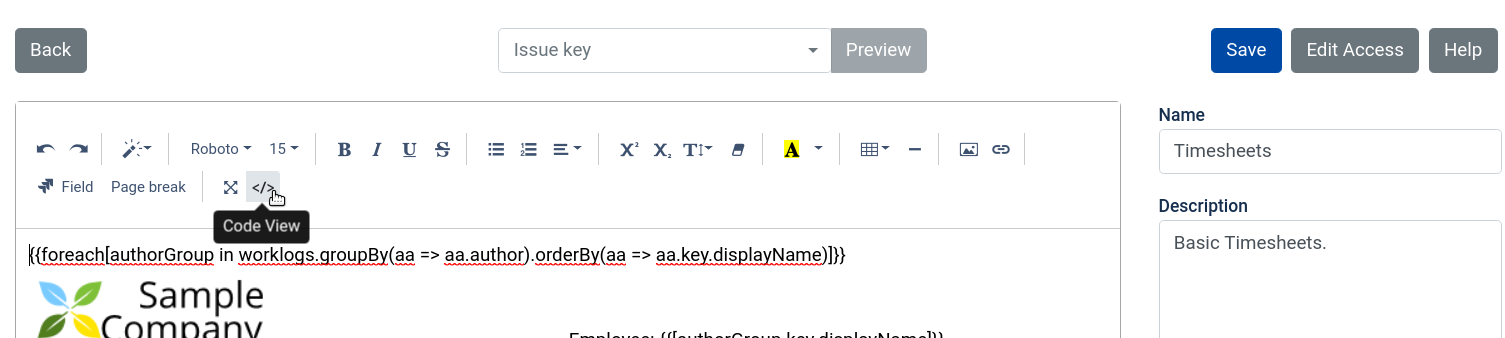
HTML templates must be copy/pasted into online template editor in Code View mode. Template layout will most likely break when pasting not in Code View mode.
1. Create template by clicking Add button on Template Management screen, or edit existing template by clicking on its name.
2. Provide template name. Select HTML for the Template format field. Make sure Context field value is set to Worklogs.
3. Select Code View mode by toggling Code View button in online editor's toolbar.
4. Paste template text into editor.
5. Click Code View button again to switch back to the regular template edit mode.
6. Click Save to save the template.
Important: all date fields must be enclosed with formatDate or formatDateTime functions, like formatDate(issue.created). Otherwise, invalid timezone can be applied to date, resulting in incorrect date. Date fields are wrapped automatically if you use Field picker in online HTML template editor. In DOC files this has to be done manually.
Functions / commands mentioned below are described in Template syntax.
| Template File | Generated PDF | Template Type | Description |
|---|
 |  | DOC | Issue Status Report by Priority.
List of issues, ordered by Priority first. Then, by Status The template shows how to: - Loop through the issues. See foreach command in template.
- Order by multiple fields. See orderBy clause and thenBy.
- Access child properties, using dot notation. See assignee.displayName, which takes property assignee of an issue, and then takes property displayName of assignee.
|
 |  | DOC | Issue Details Report.Includes basic issue fields, as well as comments and worklogs. Please note that commands were colored just to simplify template reading. Therefore, coloring is not required. The template shows how to: - Iterate: see foreach command for issues, comments, and worklogs. Foreach command can be nested: foreach for worklogs and comments (red) works inside foreach for issues (green).
- Conditions: see if / else commands. This way, we can show default text if some value is not present. For instance, see how "Unassigned" is shown when there is no assignee set.
- Verify if list is not empty. See, for example, labels.any(), where labels is a list, and any() is a command that checks for an empty value.
- Verify if field is set. See assignee.displayName == null. Here, null is a reserved keyword that means "not set". Note that lists are verified, using any, while strings can be verified, using null.
- Insert page break after every issue, except for last one to avoid blank page at the end: {{if [issue.numberOf() != jira.issues.count()]}}{{[_PAGE_BREAK_]}}{{/if}}
- Date and time formatting. See dateTimeFormat(…).
|
 |  | DOC | Estimated vs Spent vs Remaining Time.List of all issues, ordered by issue key. Includes status, estimated time, spent time, remaining time.
|
 |  | DOC | Story Estimated vs Spent vs Remaining Time.List of stories, ordered by issue key. Includes status, estimated time, spent time, remaining time. The template shows how to filter: where(i => i.issuetype.name == “Story”) clause was used to include only issues of type "Story". Note that aggregatetimeoriginalestimate, aggregatetimespent, and aggregatetimeestimate was used in this report. These fields include aggregated values, including their children (e.g. sub-tasks). If we used timeoriginalestimate, timespent, and timeestimate then report would not include time from sub-tasks. |

| 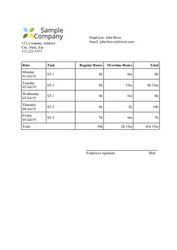 | HTML | Timesheet by DateUser time sheets, grouped by day, with overtime hours calculation. The report is based on Jira work logs. The template shows how to: - Iterate worklogs. See foreach command for worklogs.
- Group by one field, then order data inside a group. See groupBy and orderBy clauses.
- Different syntax for "Group by" clause. One is worklogs.groupBy(aa => aa.author), another one with new and curly braces authorGroup.groupBy(cc => new {cc. startedDate}). It doesn't matter which one is used when grouping by one field. When grouping by multiple fields, only seconds type of syntax is supported. For example, grouping by worklog startDate, then by issue groupBy(cc => new {cc. startedDate, cc. issue}).
- Helper functions:
- Get day of week from date. See dayOfWeek(group.key. startedDate)
- Format a date according to format defined on addon's DGJ: Configuration page. See formatDate(group.key. startedDate)
Note, that you can use either formatDate or formatDateTime, depending on whether you'd like to display time along with date. - Get regular hours from work log time using regularHours function. See regularHours (seconds, 8). The second parameter, which is 8 in this case, denotes how many hours per day can be treated as regular. Having work log for 10 hours will result in 8 regular hours, and 2 overtime hours.
- Get overtime hours from work log time using overtimeHours function. See overtimeHours(seconds, 8). The second parameter, which is 8 in this case, denotes how many hours per day can be treated as regular. Having work log for 10 hours will result in 8 regular hours, and 2 overtime hours. Having work log for 8 hours will result in 8 regular hours, and 0 overtime hours.
- Jira's work log field is number in seconds. In order to show it in hours/minutes, use toHours (seconds)
- Find minimal of two values and store it for later use in template. See min(8 * 60 * 60, seconds), which will return either 8 hours represented in seconds (8*60*60), or seconds value, depending on which one is minimal. There is also max function, that returns maximum value of two parameters.
- Accumulation. {{var [summaryRegularSeconds = summaryRegularSeconds + regularSeconds]}}
The above statement would calculate a sum of summaryRegularSeconds + regularSeconds, and put result into summaryRegularSeconds.
|
 | 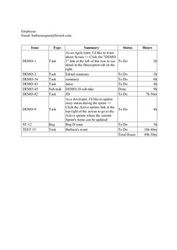 | HTML | Timesheet by IssueUser time sheets, grouped by issue. The report is based on Jira work logs. The template shows how to: - Iterate worklogs. See foreach command for worklogs.
- Group by one field, then order data inside a group. See groupBy and orderBy clauses.
- Helper functions:
- Jira's work log field is number in seconds. In order to show it in hours/minutes, use toHours (seconds)
- Fix column width in HTML template. Unfortunately, automatic column width doesn't always work good, so in order to make some column wider insert {{var [a = "MMMMMMMMMMMMMMMMMMMMMMMMMMMMMMM"]}} into that column. Column width is based on count of M characters.
- Manual accumulation. {{var [totalSeconds = totalSeconds + seconds]}}
The above statement is a counter, that would calculate a sum of hours reported by a user for all included issues and put result into totalSeconds. Please note, that the counter gets reset to zero for each user at the beginning of iteration using {{var [totalSeconds = 0 ]}} - Aggregation.
When we group by something, we can use sum to get sum of numeric values. For example, in template we group worklogs by issue issueWorklogs in employeeWorklogs.groupBy(cc => new {cc. issue}) , so we can get sum of time reported for an issue {{var [seconds = issueWorklogs. sum(c => c. timeSpentSeconds )]}}
|