Work Time Tracking Calendar comes with the two Timesheets a full-scale Work Time Calendar gadget and two timesheets gadgets: Timesheets by Issue and Timesheets by User.
To add the gadgets to your dashboard, please open your dashboard and click the Add gadget button located on the top right corner of the screen:
...
The dialog with the available gadgets will be shown. Click on the Add gadget button next to each Work Time Tracking Calendar gadget:
...
On Timesheets by User dialog, select the preferred options for the time period and users. Add a JQL if needed. Then, click Save.
...
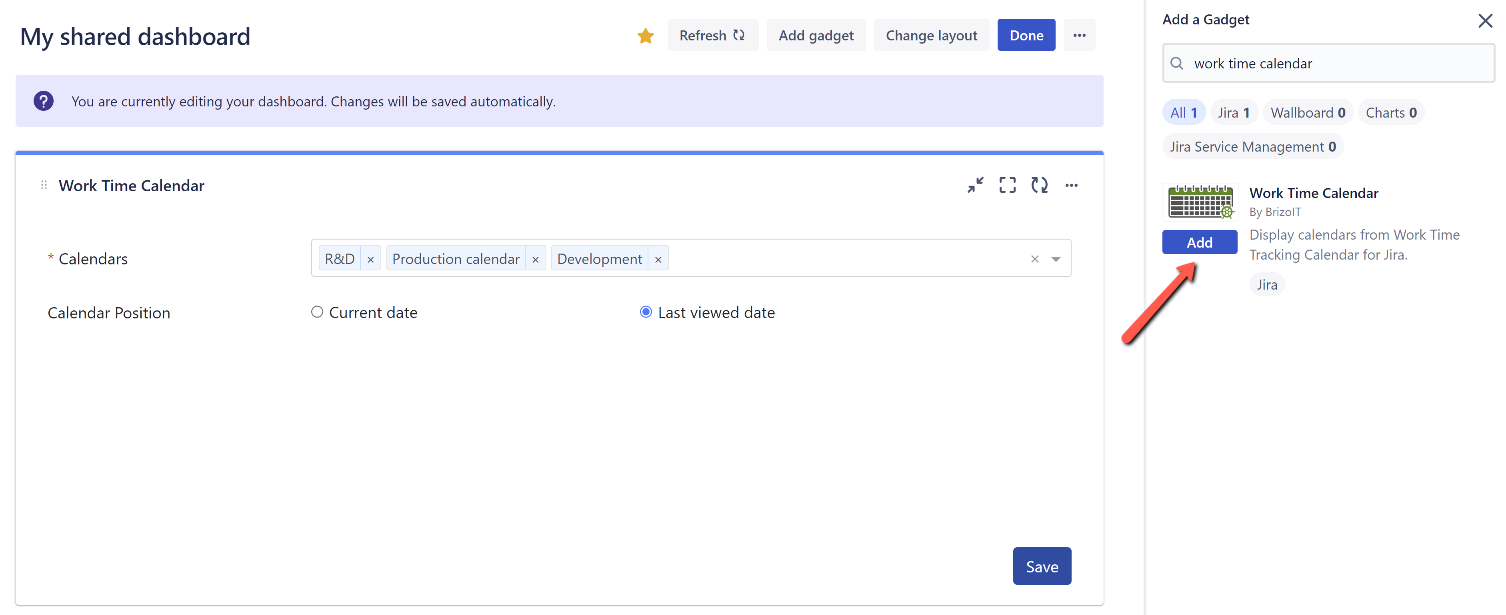
Your Simply search the required gadget by the name and add it to your dashboard.
...
| Tip |
|---|
Starting the app version v 7.0.x, app users can add a multifunctional Work Time Calendar gadget to a dashboard. |
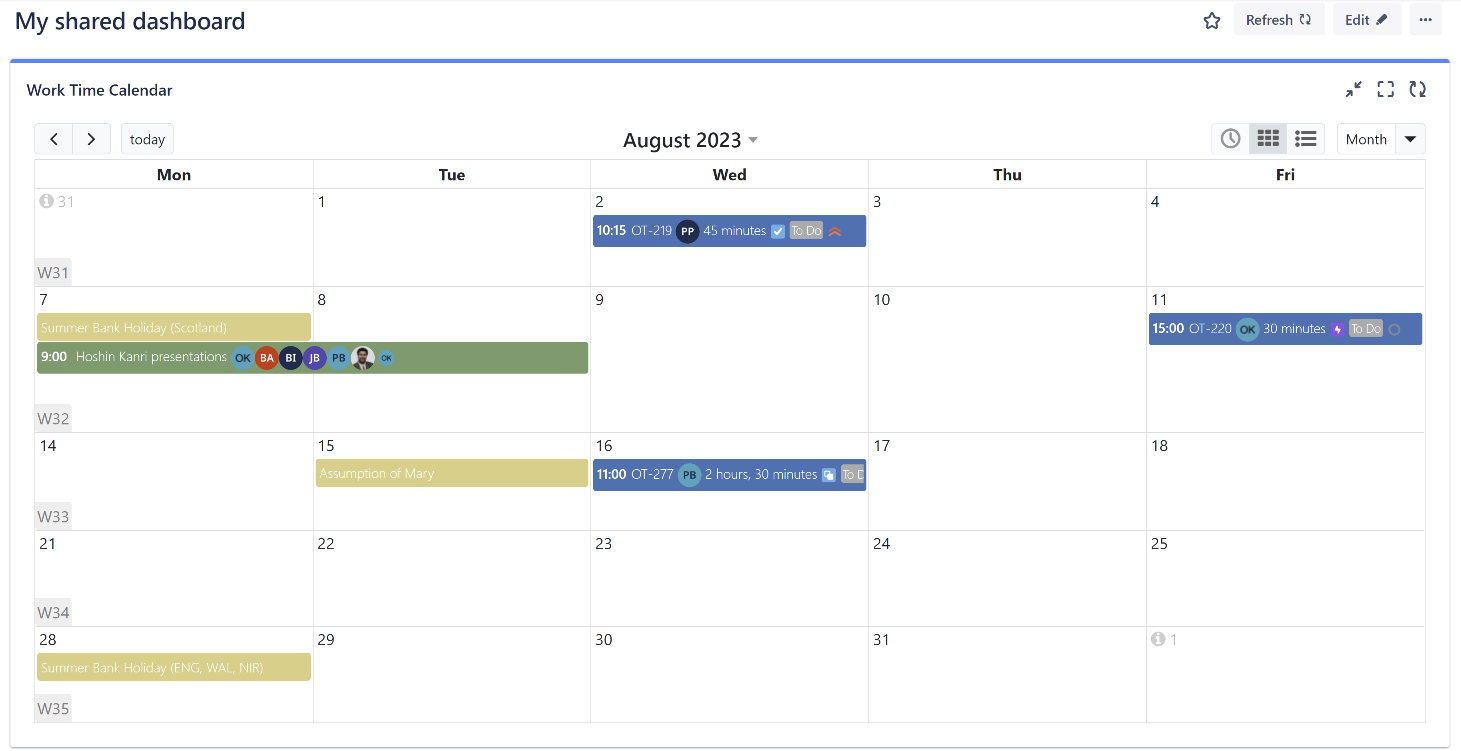
Once added, the Work Time Calendar gadget has to be configured by selecting the desired calendar(s) and calendar position.
 |
Users can navigate through the calendar by switching between different modes, clicking the left and right arrows, clicking the dates or week numbers, or by using the calendar attached to the calendar header.
 |
In addition, users can utilize the Timesheets by Issue and Timesheets by User gadgets by adding them to a dashboard.
...
Once configured, the Timesheets by User gadget might look similar to the one below:
...
Similarly, on Timesheets by Issue dialog, select the preferred options for the time period and users. Add a JQL if needed. Then, click Save.
...
Your the configured Timesheets by Issue gadget might look similar to belowas follows:
...