...
| Tip |
|---|
Introduced in the app version 7.0.x, dark theme is now available in the Work Time Tracking Calendar. The app inherits the theme set in Jira. |
 |
1. Calendars selector
Created calendars a user has access towill be shown here. For your convenience, the calendars are sorted in alphabetical order.
Multiple calendars can be selected at once by ticking their checkboxes.
2. Quick filters button
Issue-based events can be filtered by such fields as Assignee, Status, Issue Type, Priority and Reporter.
 |
3. Main buttons
From left to right, Refresh calendar data, Calendar mode, Report mode, Add new calendar, Current calendar configuration, and User settings.
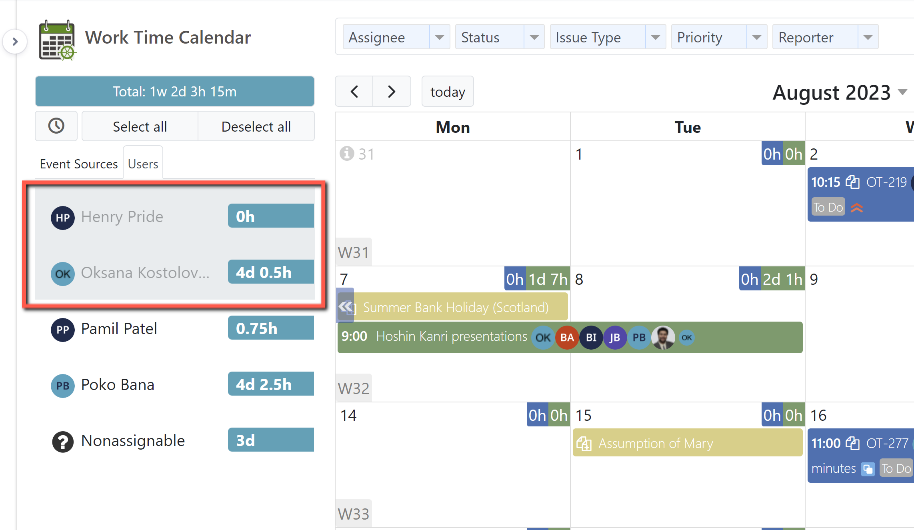
2. Created calendars
Created calendars will be shown here. Multiple calendars can be selected at once by ticking their checkboxes.
3. Work Time Tracking Calendar documentation
Quick access to the app documentation.
4. Navigation buttons
From left to right, previous calendar period, next calendar period, and today’s date.
...
From left to right, Time grid view, Calendar view, List view and Timeline view.
7. Calendar period
...
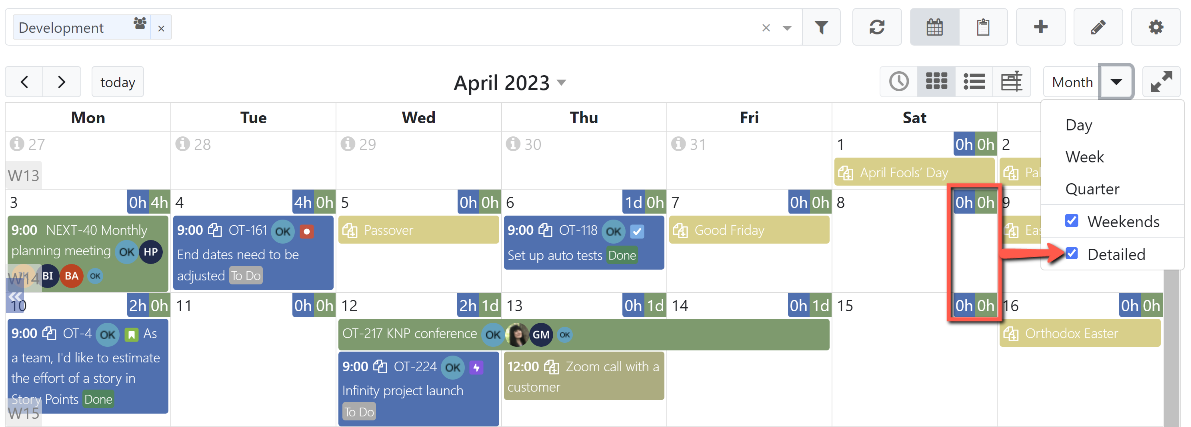
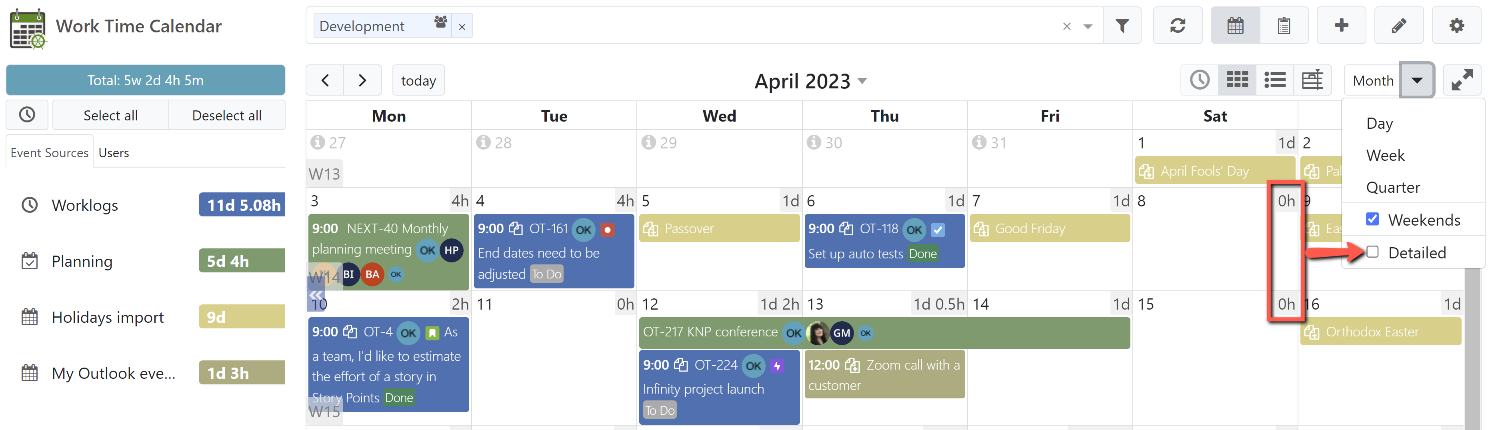
, Weekends visibility and Detailed daily hours
Select the day, week. , month or quarter calendar period. Configure weekends visibility. Display daily event hours by source.
8. Full screen
...
mode
Open a calendar in a the full screen view.
9. Calendar
The created events will be shown here.
10. Collapse/expand the sidebar
Collapse or expand the left-side panel.
...
| Tip |
|---|
As of the app version 7.0.x, the week numbers are conveniently displayed at the top left corner of the day cell. |
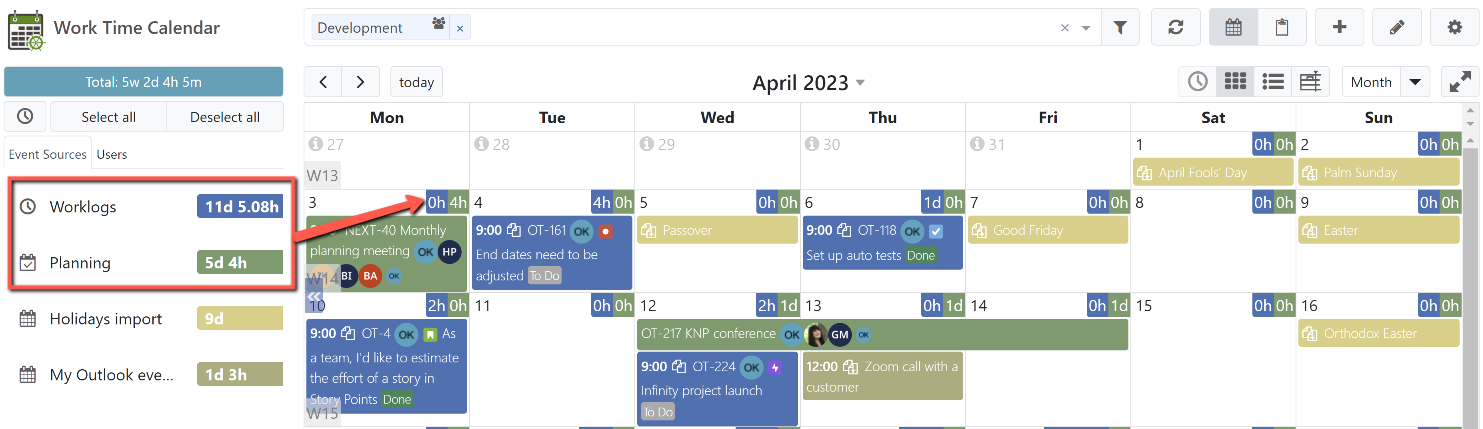
10. Total
The Total shows either total hours or total days for the events displayed on a current in the currently selected calendar period. You can switch between hours and days by clicking on Total.
Daily total hours (days) are displayed on a calendar for each corresponding date.
Should you prefer to see the daily total time in details by source, tick the checkbox next to Detailed.
...
| Info |
|---|
If necessary, a user can disable the display of daily total hours (days) under the User settings. |
 |
The daily total hours (days) displayed in the top right corner of a day cell represent the first two enabled event sources on the left panel.
 |
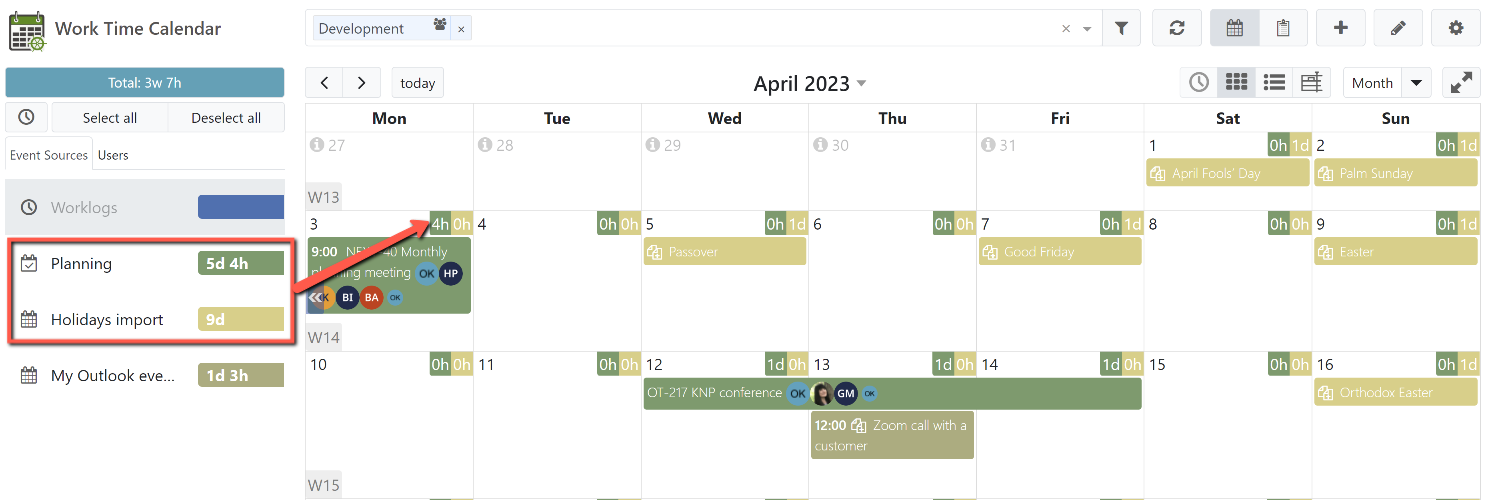 |
By hovering over the daily total hours (days), a user can see the total hours (days) of all events for a specific day as well as the sub-total for each event source which has any events based on it that day.
 |
When the detailed view is disabled, a user can only see the total hours (days) of all events for a given day.
 |
By hovering over the total hours (days) for a specific day, a user can still see the total hours (days) of all events taking place that day as well as the sub-total for each event source which has any events based on it that day.
 |
| Tip |
|---|
Would you like to see Logged versus Planned time for each day? Please see the instructions provided on our FAQ page. |
11. Work panel
Open the work panel to allow for quick event creation based on the enabled event sources.
12. Select all / Deselect all
Quickly select or deselect all sources or users. To select or deselect a particular source or user, simply, click on it.
13. Event sources / Users
Switch between sources and users. You can select or deselect a particular source or user.
| Info |
|---|
Inactive users are greyed out under the Users tab, on the left panel. |
 |
14. Calendar
The calendar opens by default when the app is open.
15. Timers
Open the Timers dialog.
16. Log Work
Log work quickly, without clicking on a calendar.
17. User information tooltip
| Tip |
|---|
Beginning the app version 7.0.x, a user info tooltip is displayed on hover over the user avatar on the event block, information dialog, and under the Users tab on the left panel. |
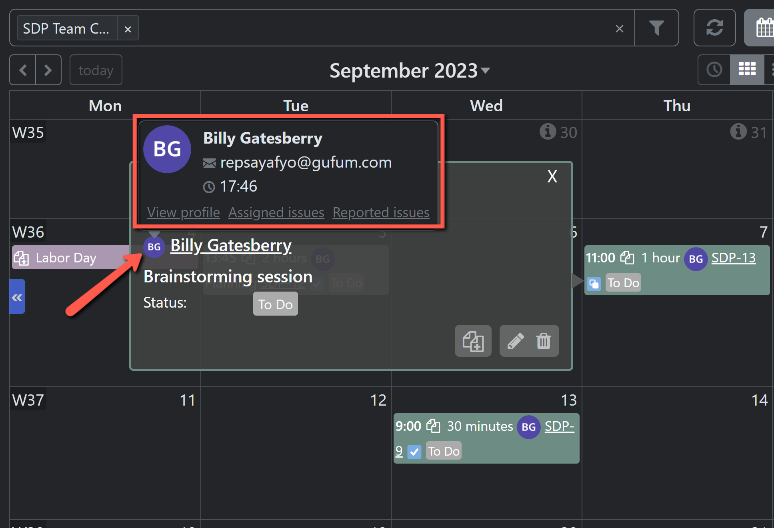 |
| Info |
|---|
The display of the user’s email and local time depends on the Jira Personal settings. |
For your convenience, the tooltip features the View profile, Assigned issues and Reported issues links.